
 Video editing has come a long way from the days of physically splicing film reels. Today, it’s a world of precision tools, software innovations, and specialized techniques. Whether you’re piecing together a Hollywood blockbuster or creating a snappy TikTok, understanding the different types of video editing is essential to finding the right approach for your project.
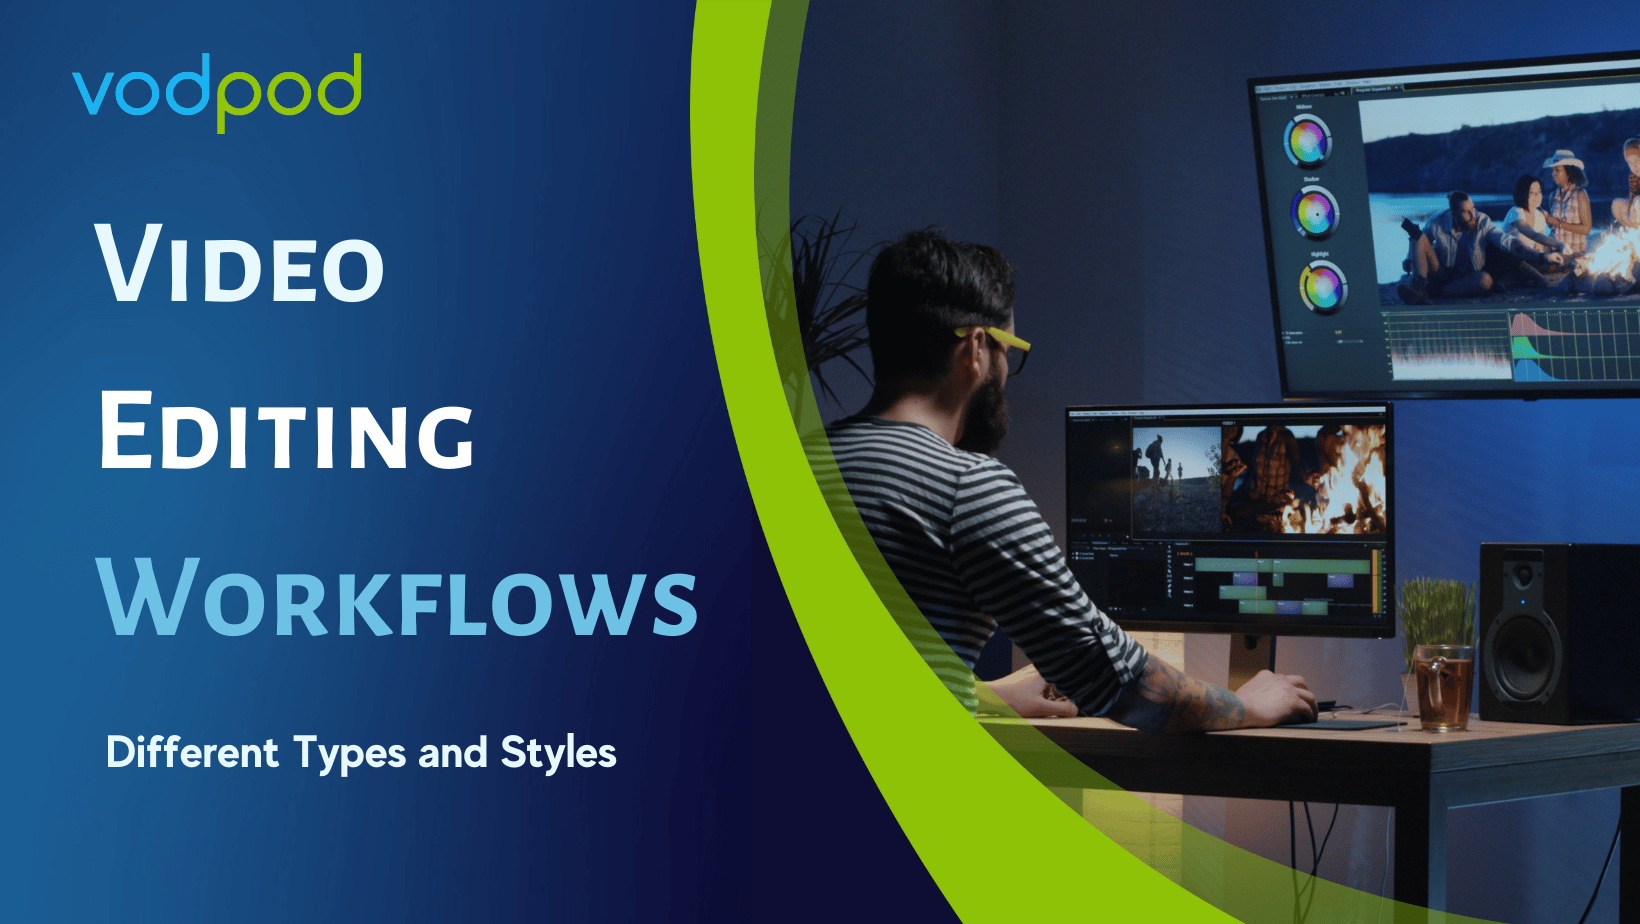
There are a few primary types of video editing workflows, they are Linear Editing (which involves working sequentially, much like editing film reels), Non-linear Editing (“NLE”, which offers the flexibility to cut, rearrange, and enhance clips in any order using software), Live Editing (“vision mixing”, happens in real-time during live broadcasts or events), Offline Editing, Online Editing and Color Grading (meticulous color adjustments). Together, these methods cover the spectrum of video editing workflows.
P.S. If you are looking for Video Editing Techniques (like types of cuts, approaches to storytelling), that is not covered in this article. For this, see our full guide on Video Editing Techniques!
Below we dive into the details of these types of video editing workflows in detail. Let’s get into it!

1. Linear Editing
Linear video editing is a sequential process where clips are arranged and edited in a strict chronological order. This technique originated with analog video (i.e. film) and involves transferring footage from one film/ tape to another in the desired sequence. Edits are performed directly on the source material, making it necessary to complete changes in order, as going back to adjust earlier parts of the sequence often requires redoing subsequent edits.
Linear editing emerged in the mid-20th century, with analog tape editing being the standard method for crafting video content. Editors used videotape recorders (VTRs) to copy footage from one tape to another in a step-by-step process. Each edit had to be performed in sequence, as altering earlier parts of a project required redoing all subsequent edits. It was widely used in broadcasting and film production until the advent of digital methods in the 1980s and 1990s.
Linear editing relies on physical hardware, such as VTRs, time-base correctors, and editing consoles. Tools like the Sony BVU series and Ampex VTRs were staples in editing suites. These machines allowed editors to cut footage, add transitions, and assemble sequences with precision, but the process was time-intensive and lacked flexibility. The transition to digital technology, with its non-destructive workflows, rendered linear editing nearly obsolete, though some live production workflows still employ linear techniques.
Despite being nearly obsolete, understanding the principles of Linear Editing can help with with understanding many concepts of modern video editing as we know it today.
2. Non-Linear Editing
Non-linear editing (NLE) is a video editing method that allows editors to access and manipulate any part of the footage at any time without following a sequential order. Unlike traditional linear editing, where edits must be performed chronologically, NLE uses digital tools to enable flexible, non-destructive workflows. Editors can rearrange clips, experiment with transitions, and add effects without altering the original files. Widely used in film, television, and digital media, NLE is the foundation of modern video production, offering unmatched creative freedom and efficiency.
Non-linear editing emerged in the late 1980s and early 1990s with the advent of digital video technologies. Unlike linear editing, which required edits to be performed in sequence, NLE allowed editors to access any part of the footage at any time, similar to editing text in a word processor. Early systems like the CMX 600 (a precursor to NLE) and later software like Avid Media Composer and Adobe Premiere Pro reshaped the industry, making the physical splicing of film or tape unnecessary. By the mid-1990s, NLE became the standard for video production in television, film, and corporate content creation.
NLE relies on digital storage and editing software to manipulate video files non-destructively. Source footage is digitized or imported, allowing edits without altering the original files. Key features include timelines, layers, real-time previews, and advanced tools for transitions, effects, and audio synchronization. Modern systems support 4K, 8K, and even HDR workflows, enabling filmmakers and content creators to achieve cinematic results from their desktops. Popular NLE software includes Adobe Premiere Pro, Final Cut Pro, DaVinci Resolve, and Avid Media Composer.
3. Living Editing (Visual Mixing)
Live editing, also known as vision mixing, is the process of combining multiple video sources in real-time during live events or broadcasts. A vision mixer or switcher is used to transition between camera feeds, add graphics, or overlay effects on the fly. This technique is essential for live TV shows, sports broadcasts, concerts, and any production where immediate output is required.
Historically, live editing traces its roots back to the early days of television, where switching between camera feeds was done manually using analog switchers. As broadcasting grew in complexity, digital vision mixers were introduced, allowing for seamless transitions, multi-layered effects, and integration with other production systems. This evolution enabled broadcasters to manage increasingly dynamic and visually rich live events.
In terms of technology, modern live editing relies on advanced vision mixers and software-based systems. These tools can handle multiple video feeds, including high-definition and 4K inputs, and integrate with real-time graphics, audio, and external sources like social media streams. Hardware switchers, such as those by Blackmagic Design or Grass Valley, remain staples in professional environments, while software solutions like OBS Studio provide affordable alternatives for smaller productions.
Practically, live editing is invaluable for scenarios where immediacy is key. Sports events use vision mixing to cut between action shots and replays, while live concerts blend stage cameras with audience views and visual effects. The approach ensures that viewers experience a polished, dynamic broadcast in real-time, making it an essential skill for live production teams.
4. Offline Editing
Offline editing is the process of creating a preliminary or “rough” cut of a video project using low-resolution or proxy versions of the original footage. This stage focuses on assembling the story, arranging clips, and making initial edits, without applying final visual effects, color grading, or high-resolution rendering. It’s a critical step in video production where the creative vision takes shape before moving to the final stages.
Historically, offline editing became prominent with the rise of digital editing systems in the 1980s and 1990s, as working with high-resolution footage was resource-intensive and time-consuming. Editors used proxy files—low-quality duplicates of the original media—to make the editing process faster and more efficient. Once the edit was finalized, the decisions were applied to the full-quality footage in the online editing phase. This workflow was essential in film production, where high-quality film scans required careful resource management.
Technologically, offline editing relies on non-linear editing systems (NLEs) like Adobe Premiere Pro, Avid Media Composer, or DaVinci Resolve. These tools allow editors to seamlessly switch between proxies and full-resolution footage, facilitating a streamlined workflow. Proxies are often automatically generated to match the resolution and format required for smoother editing, reducing strain on hardware while preserving the integrity of the original media.
In practice, offline editing is used in projects with extensive footage, such as feature films, documentaries, and large-scale commercial productions. By focusing solely on structure and narrative during this phase, editors can make creative decisions more quickly. Once the offline cut is locked, the project transitions to online editing for polishing, effects, and final delivery. This division of labor ensures efficiency and allows for greater focus on storytelling in the initial phase.
5. Online Editing
Online editing is the final stage of the video post-production process, where the project is polished, refined, and prepared for distribution. In this phase, the high-resolution or full-quality footage replaces any proxies used during offline editing, and final adjustments are made. Tasks like color correction, visual effects, audio synchronization, and mastering are completed to ensure the project meets technical and creative standards.
Historically, online editing emerged alongside offline editing as a way to handle the resource limitations of early editing systems. While offline editing used proxies to simplify the process, online editing allowed editors to apply their decisions to the full-resolution footage. In the era of analog editing, online editing was performed directly on master tapes, requiring high precision. With the shift to digital workflows, it became more integrated and versatile, handling complex visual effects and multi-layered compositions.
From a technological perspective, online editing relies on powerful systems capable of processing high-resolution media, such as 4K, 8K, or HDR footage. Tools like DaVinci Resolve, Flame, and Avid Symphony are designed for this purpose, offering advanced features for fine-tuning color grading, applying transitions, and ensuring compliance with broadcast or theatrical standards. Modern online editing workflows also incorporate GPU acceleration and cloud-based collaboration for efficiency.
In practical terms, online editing is used to create a polished and professional final product, ensuring the video looks and sounds its best. For example, in a feature film, the editor replaces the rough proxy footage with the original 4K or 8K files, matches the color grading to the desired look, adds final visual effects, and prepares the output for cinemas or streaming platforms. This phase is the bridge between the creative vision established in offline editing and the finished product delivered to audiences.
6. Cloud-based Editing
Cloud-based editing is a method of video editing that uses cloud storage and processing to access, edit, and collaborate on video projects from anywhere with an internet connection. It eliminates the need for local storage and allows multiple users to work on the same project in real time.
Historically, cloud-based editing emerged as high-speed internet and cloud computing became more widespread in the early 2010s. Before this, video editing relied heavily on local hardware and storage, which posed challenges for remote collaboration. Platforms like Frame.io and services from Adobe and Blackmagic Design introduced cloud-enabled tools, making it easier for teams to collaborate without being physically together. This marked a shift in how video production teams approached workflows, particularly in industries with distributed teams.
Technologically, cloud-based editing relies on a combination of cloud storage, high-speed internet, and software that supports remote workflows. Files are stored on cloud servers, and users access them via web-based or hybrid applications. Some solutions, like Adobe Creative Cloud and Blackmagic Cloud, provide seamless synchronization across devices, while others, like WeVideo, offer browser-based editing. The technology also leverages GPU acceleration and scalable cloud computing for rendering and processing tasks, minimizing hardware dependency.
Practically, cloud-based editing is ideal for collaborative projects and teams working remotely. For example, a production team spread across different locations can upload footage to the cloud, allowing editors, colorists, and producers to access and review the project in real time. It also simplifies version control and reduces the risk of losing data. However, the approach requires reliable internet and can incur higher costs for storage and processing, making it a powerful but context-dependent solution for video production.
7. Color Grading
Color grading is the process of adjusting and enhancing the colors in a video to achieve a specific look, mood, or tone. It involves manipulating elements like brightness, contrast, saturation, and color balance to create a visually cohesive and emotionally impactful final product. Color grading goes beyond correcting footage—it’s about giving the video its artistic and cinematic identity.
Historically, color grading began with film, where colorists used physical techniques like chemical processing or tinting to alter the appearance of footage. As technology evolved, telecine machines allowed for digital color correction during the transfer of film to video. The introduction of digital non-linear editing systems in the late 20th century revolutionized color grading, providing more precision and creative control. Films like O Brother, Where Art Thou? showcased the power of digital grading, setting a standard for modern workflows.
Technologically, color grading relies on advanced software like DaVinci Resolve, Adobe Premiere Pro, or Baselight, often paired with specialized hardware like control panels for precision adjustments. These tools allow colorists to fine-tune individual frames, apply cinematic color palettes, and ensure consistency across shots. Features like HDR support, LUTs (Look-Up Tables), and node-based workflows enable detailed control over the visual aesthetic, from subtle corrections to dramatic stylization.
In practice, color grading is essential for aligning the visual style with the story’s mood and the director’s vision. For instance, a romantic drama might use warm tones to evoke intimacy, while a thriller could employ desaturated hues and high contrast to heighten tension. In addition to artistic considerations, color grading ensures technical consistency, such as balancing skin tones and meeting broadcast or theatrical standards. It’s the final artistic flourish that brings a video’s visual identity to life.
8. Color Correction
Color correction is the process of adjusting and balancing the colors in video footage to make it appear natural and consistent. It involves fixing issues like incorrect white balance, exposure, and color casts to ensure that the video looks realistic and technically accurate.
Historically, color correction has roots in film production, where cinematographers and colorists would work with physical film to correct exposure and balance colors. Early color correction techniques were labor-intensive and involved chemical processes or manual adjustments during the film transfer to video. As digital editing emerged, software solutions like telecine machines and digital intermediate workflows made color correction more precise and accessible.
In terms of technology, color correction relies on advanced editing tools integrated into software like DaVinci Resolve, Adobe Premiere Pro, and Final Cut Pro. These tools enable adjustments to brightness, contrast, saturation, and white balance with precision. Features like scopes (waveform, RGB parade, vectorscope) ensure that corrections align with broadcast or cinematic standards, and calibrated monitors provide accurate representations of colors.
Practically, color correction is a foundational step in post-production, ensuring that footage looks uniform and meets technical requirements before creative decisions like color grading are applied. For instance, footage shot in varying lighting conditions can be corrected to match seamlessly, creating a cohesive visual flow. It’s the essential groundwork that prepares video content for further artistic enhancement or final distribution.
Frequently Asked Questions About Video Editing Workflows
Below find some frequently asked questions about Video Editing workflows.
Where can I find a good Video Editing Service to hire?
You are in luck! Vodpod is a full service Video Editing and Video Marketing agency. See our service page for more info: Vodpod Video Editing Service.
What is the difference between offline and online editing?
Offline editing focuses on assembling a rough cut using proxy or low-resolution footage to streamline the editing process. Online editing involves finalizing the project with full-resolution footage, color grading, and effects to prepare it for distribution.
I want to know more about Video Editing Techniques, where can I learn about that?
Vodpod has a dedicated article for this! Read more here: Video Editing Techniques.
How do I organize footage for an efficient workflow?
Start by creating a clear folder structure, categorizing files into bins (e.g., by scenes, takes, or shot types). Use metadata tags, consistent naming conventions, and proxy files for large projects to keep the editing process organized and efficient.
What is a proxy file, and why is it used?
A proxy file is a lower-resolution version of the original footage. It’s used to reduce hardware strain during editing, making the process smoother without altering the final output.
How do I collaborate with a team on a video project?
Use cloud-based platforms like Frame.io or shared storage systems to enable collaborative editing. Assign roles for offline editing, online editing, and color grading to streamline the workflow.